

☕️ TL;DR – AutoCut detects the cut points in videos and automatically splits the video at each cut point, saving you valuable time. The resulting “pieces” of the video are called Shots and can be split further or merged according to what you need.
AutoCut uses AI to analyze videos and determine where the editor originally inserted Cuts or Transitions between Shots. The Shots are displayed on a screen we call the Shot List.
Pro Tip: Shots are the building blocks of editing in Kamua. You edit Shots into Clips on the Timeline. You should learn all there is to know about Shots so you can get the most out of Kamua. Learn more ![]()

AutoCut Works by Default: You do not need to do anything!
Every time you upload or link a video to Kamua, we automatically process it and apply AutoCut to it. The simple reason we do this is because we believe it’s easier for you to see what’s inside your videos when they are displayed Shot-by-Shot, and it speeds up the editing process.
So, basically AutoCut is the technology and feature that cuts videos into their component Shots, and the Shot List is where you work with your Shots.
What if I only want to AutoCut a portion of the Clip?


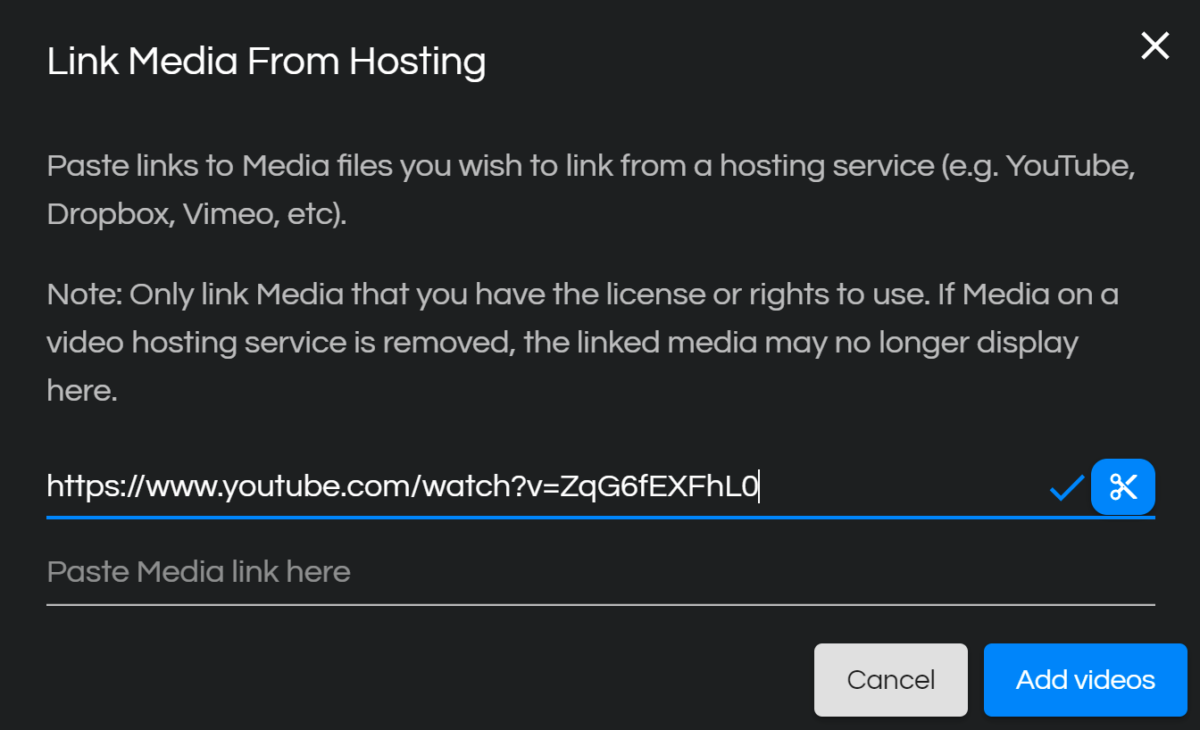
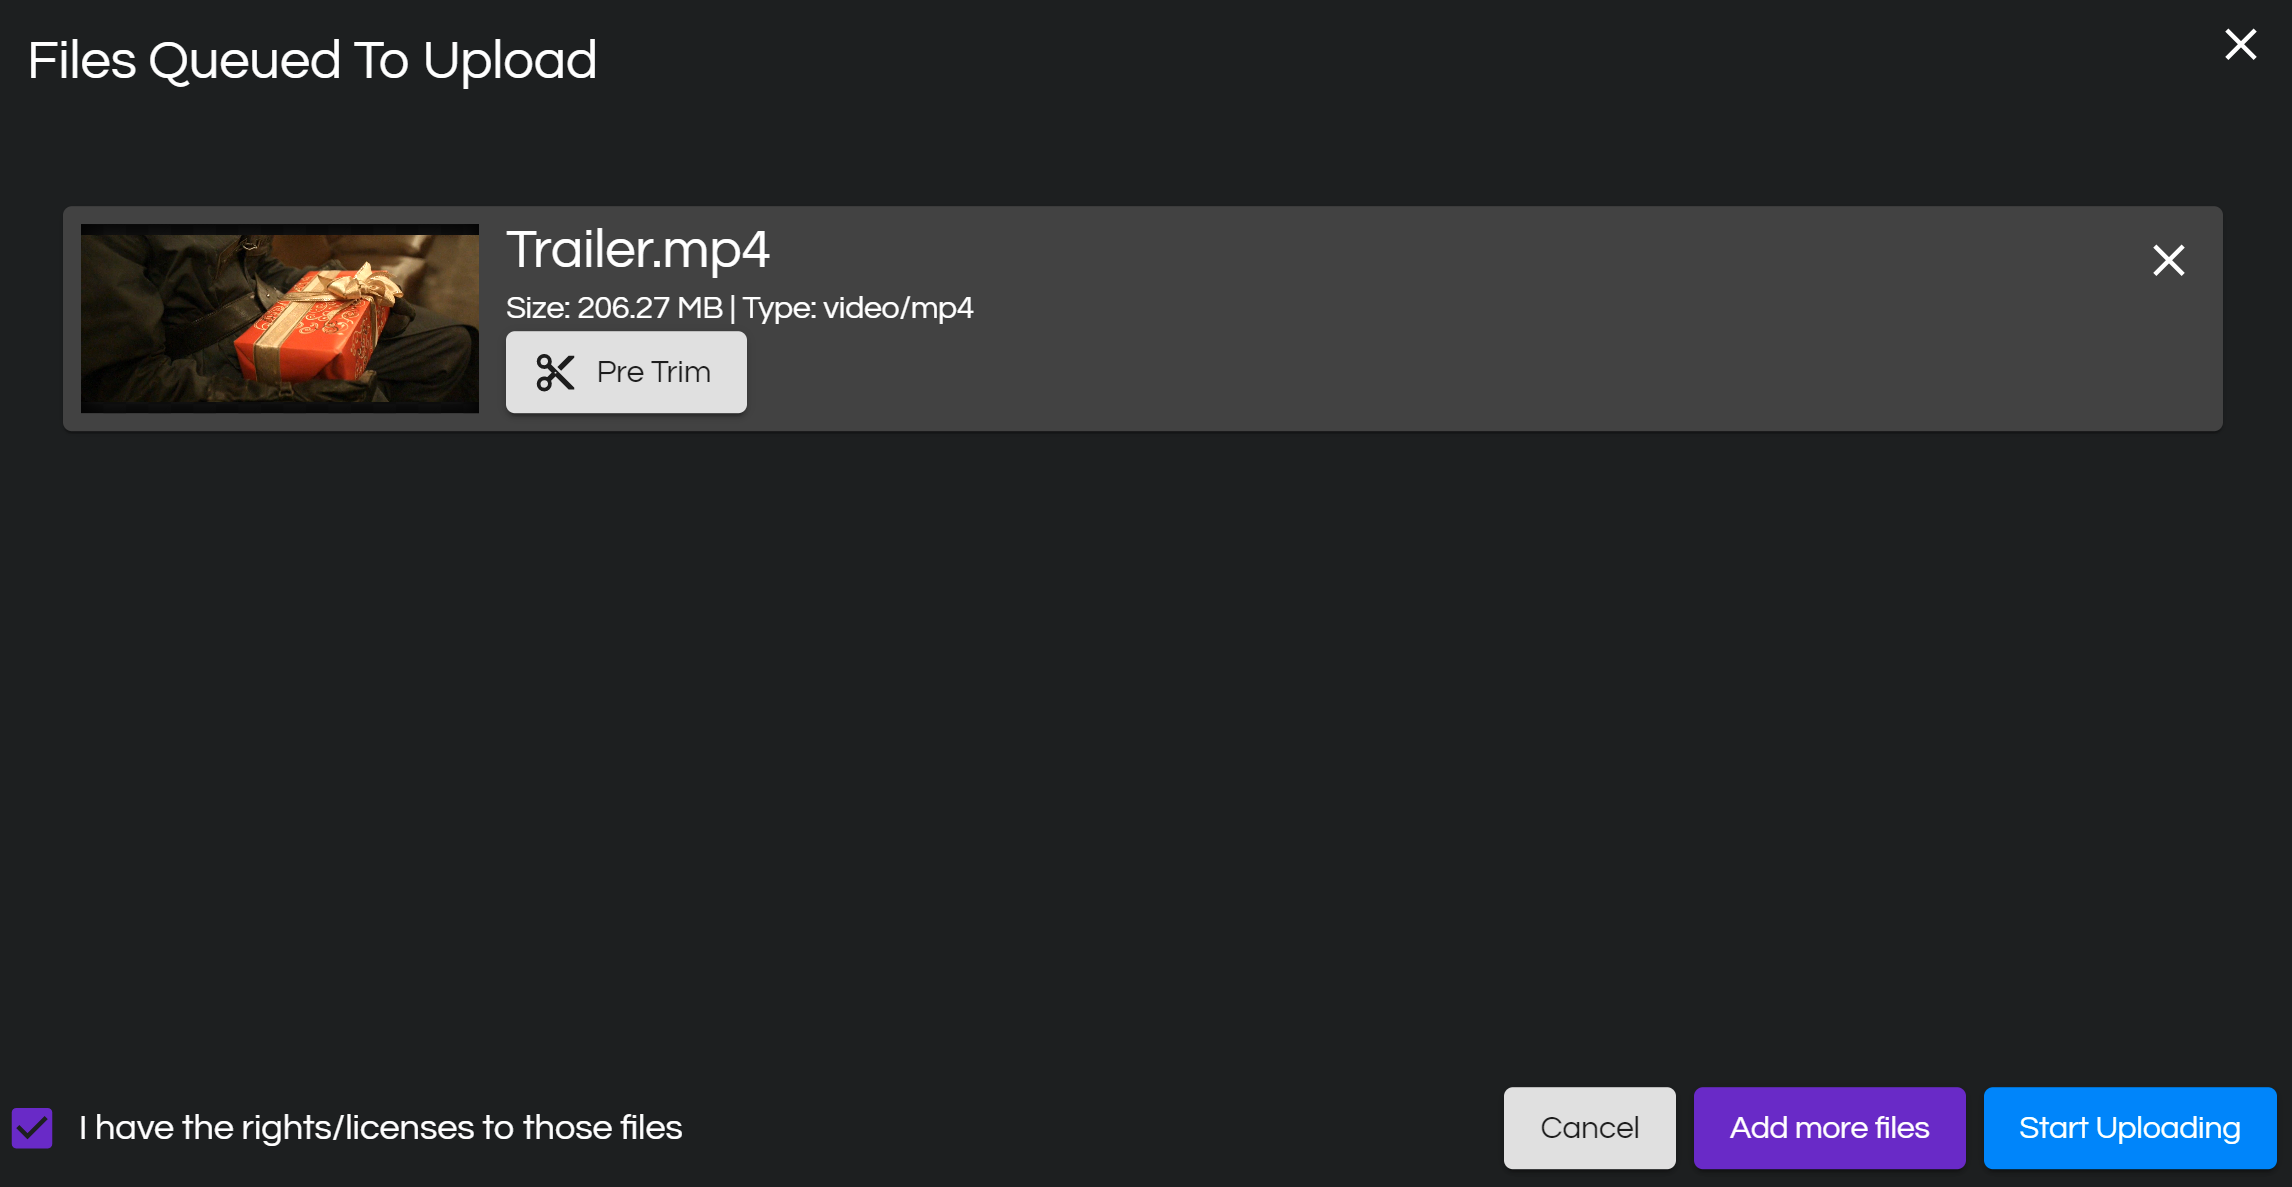
Before Kamua imports the video, you have the option to Pre-Trim it.

On linking a file, this is the blue scissor button 

On uploading a file, this is the gray Pre Trim button next to the thumbnail.
Clicking these will enter Pre Trim mode, where you can drag the blue handles below the video, to set its start and end points.
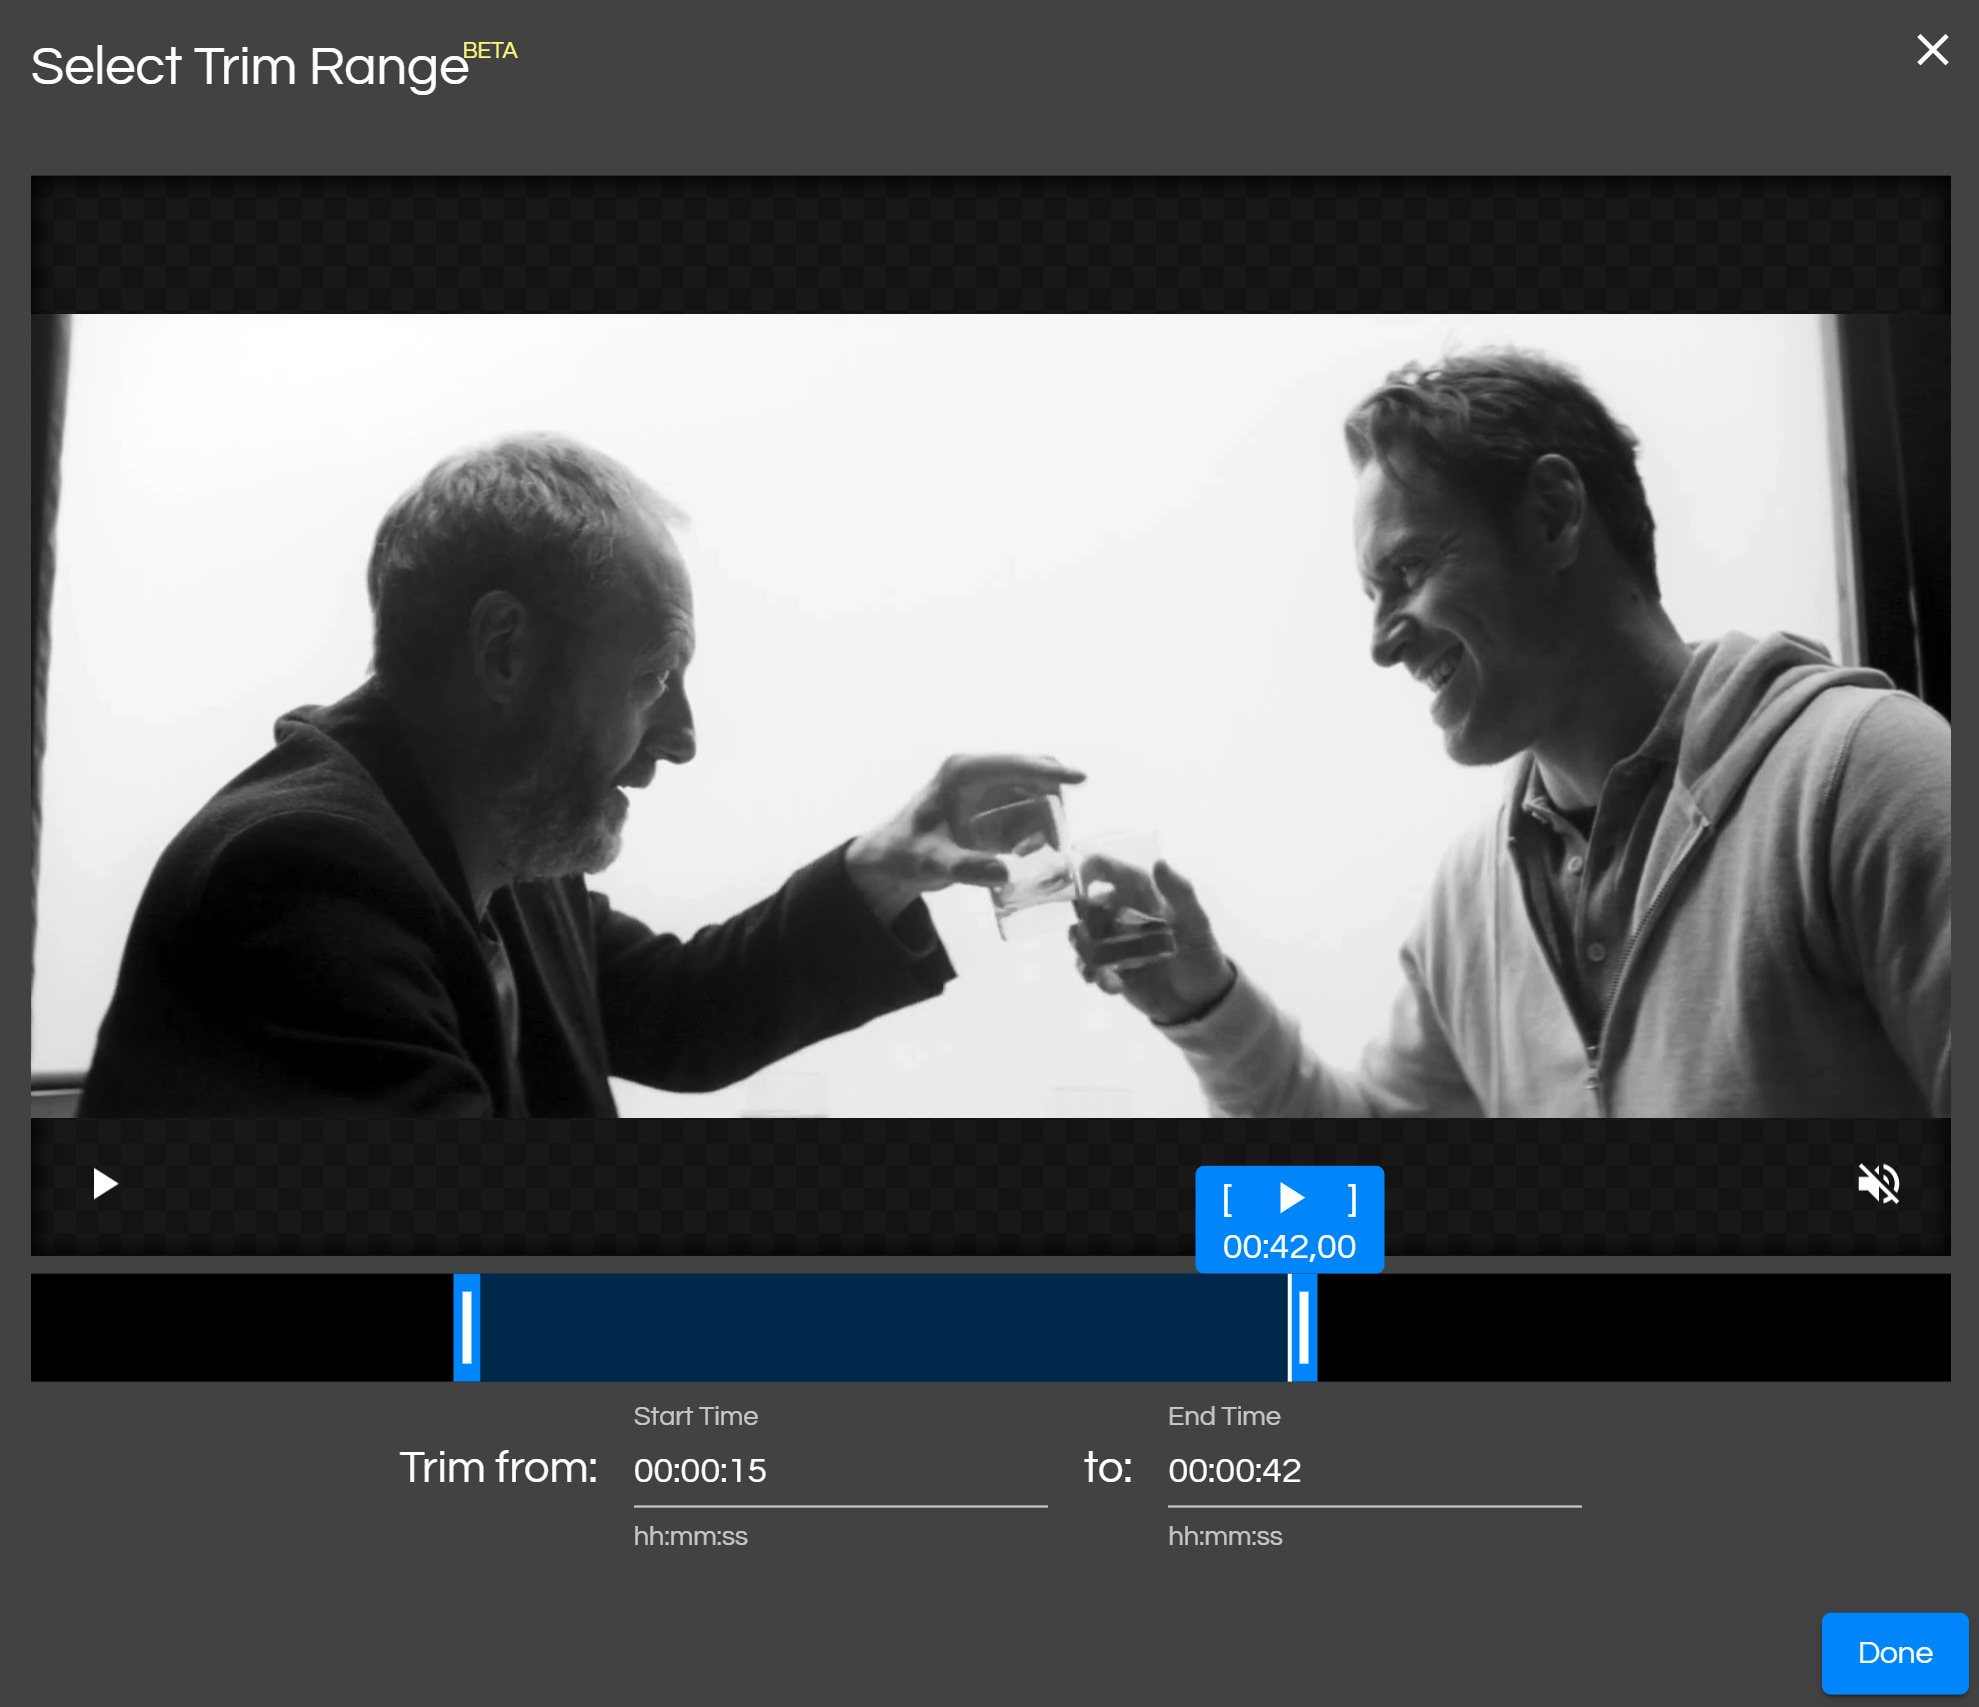

After clicking Done, you will see the information about your trim beneath the video.
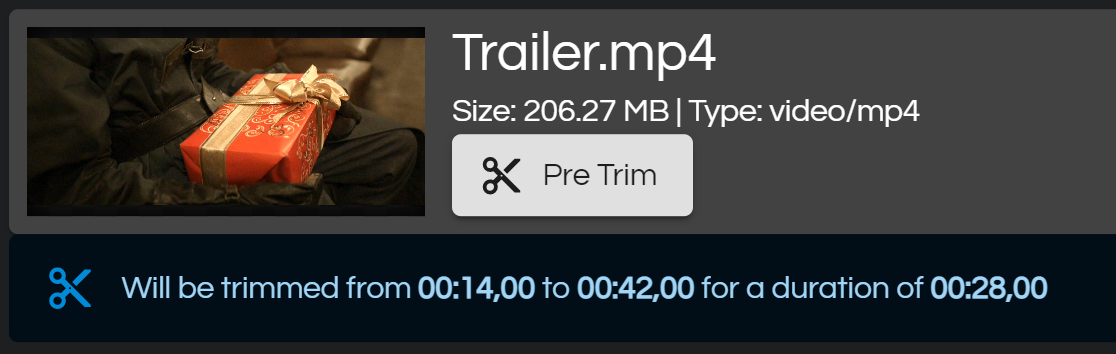

You can click the Pre Trim button again to adjust the trim, but once you click Add Videos or Start Uploading, the video will be submitted to Kamua for processing.
Heads Up: When Pre Trimming, the entire video will still be uploaded or linked, but Kamua will only process the trim region and only the Shots from that portion of the video will be displayed in the Shot List.
What Can I do in the Shot List screen?
Quite a few things:
- Browse your Shots and auto-play them with mouse-over
- Split or Merge Shots
- Filter shots based on duration and transitions using the filter icon

- Add Shots to the Timeline
Head over to the Shot List ![]()